
Posted on December 9, 2020
How to Add a Featured Image to Your WordPress Website
When it comes to blogging, something that many people don’t think about is images. It’s all about words on the page, right?
Although that is true, there are other parts of a blog that you need if you want to succeed. One of those things is the featured image.
Keep reading to learn more about featured images, how to add them to your WordPress website, and why they are so important to have!
What is a featured image?
Let’s start at the beginning here. Reading this blog post, did you notice the image that’s at the very top and located after the title of the blog?
That is the featured image of the blog. You’ll notice that in our case, it includes the title of the blog and is easy to read.
If you’re putting featured images into your own blog posts (and you should be) they don’t need to look like this, but they should follow a similar format.
Here’s why.
Nobody likes looking at a block of text that runs together and sentences after sentence of text. You may have noticed that our own blog posts follow a certain kind of formula that makes them easy to read.
Paragraphs are only one to two sentences usually. This makes it a lot easier for you to keep track of what you’re reading and it makes it easier to skim as well.
These are deliberate actions taken on our part. Adding a featured image at the top of every single blog post that we publish here at Glacial is the same as well.
Images are a great way to break up the text, especially when you’re publishing blogs. If your blog post is on the longer side (over 600 words) you may want to add more than one image to break up your text further. This is especially useful when you’re looking at blogs on a mobile device.
How to add a featured image to your WordPress website
There’s nothing really complicated about featured images and why you need them. But what seems to be the hardest part for people is how to add them. Let’s go step by step here so you understand the basics of adding featured images to your own WordPress website.
Step 1: Before you do anything, save your draft first.
Step 2: After saving your draft, click over to the Media section of your dashboard.
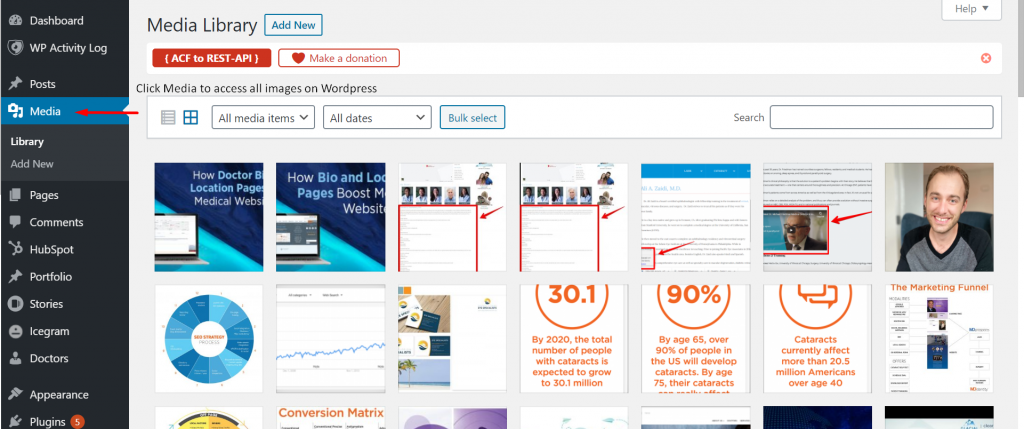
You’ll find this on the left-hand side of every WordPress website. Once you’ve clicked Media, you’ll be prompted to select an image. Make sure that whatever image you select is horizontal and not vertical.
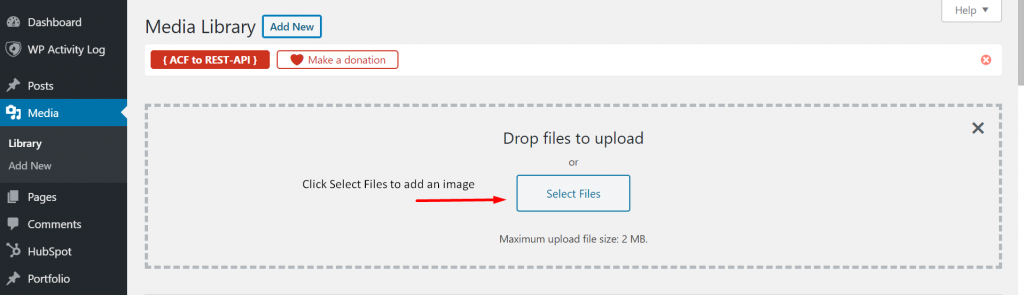
This matters because most people want to post their blog posts on social media, especially on Facebook. If your image is not horizontal, your image will not fit properly. Sticking to an image that’s 560 x 315 pixels works well, provided it’s horizontal.
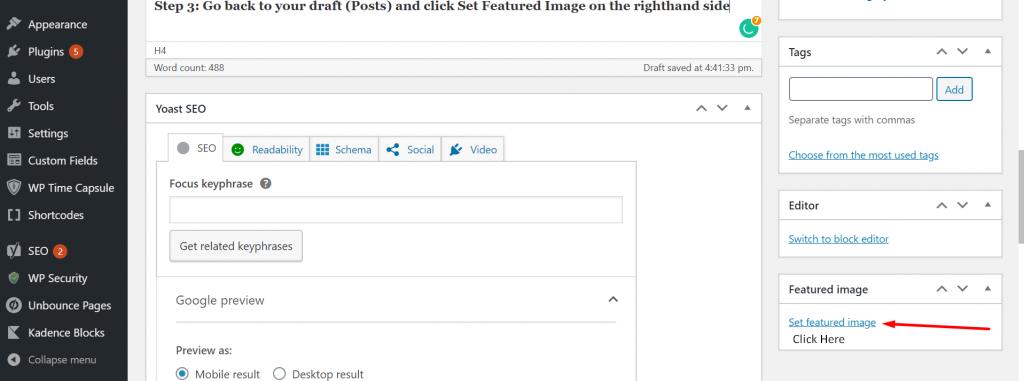
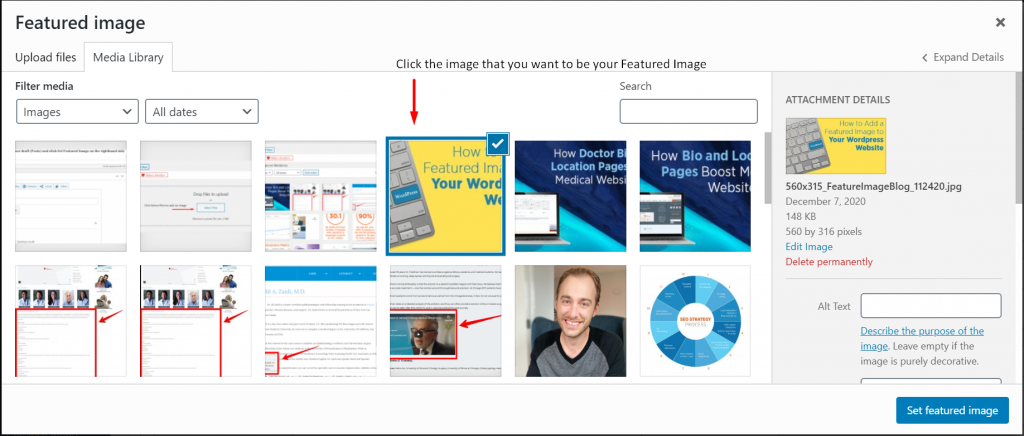
Step 3: Go back to your draft (Posts) and click Set Featured Image on the right-hand side
Once you click Set featured image, a dialogue box will appear with all the media you’ve added to your website. Click the image that you want to be the featured image, and then scroll down to the blue button where it says Set featured image. This will save and set your featured image.
Now that you’ve set the featured image, all you need to do is save your draft (again). Really, you can never save a post too many times. Better safe than sorry.
After saving again, go to the top of your post. Add a little space in front of whatever you’ve already written, courtesy of the enter button.
Then, once you’ve given yourself that space, go up to where it says Add Media. Since you’ve already added the featured image to your website, you don’t need to exit out of your post to add it to the top of it.
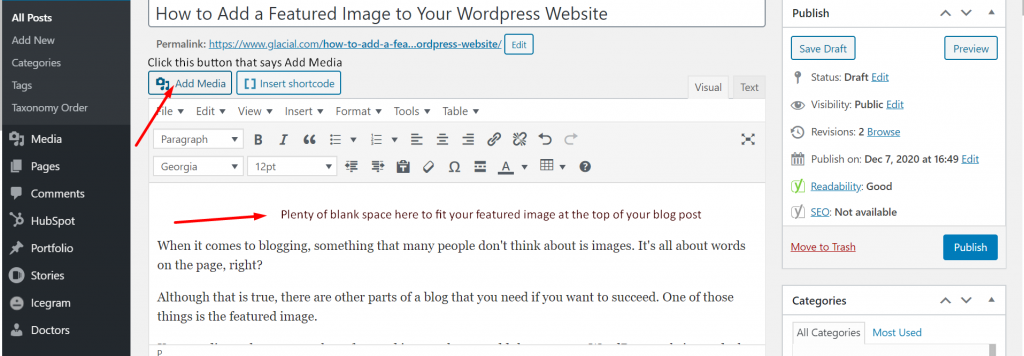
Simply click the button at the top that says Add Media (you’ll see a camera icon and a music note). Once you’ve clicked Add Media, another dialogue box will appear.
This will look like the same dialogue box that you saw earlier to add your featured image on the right-hand side. Simply click the image, and scroll down to the bottom where you’ll see the options for alignment.
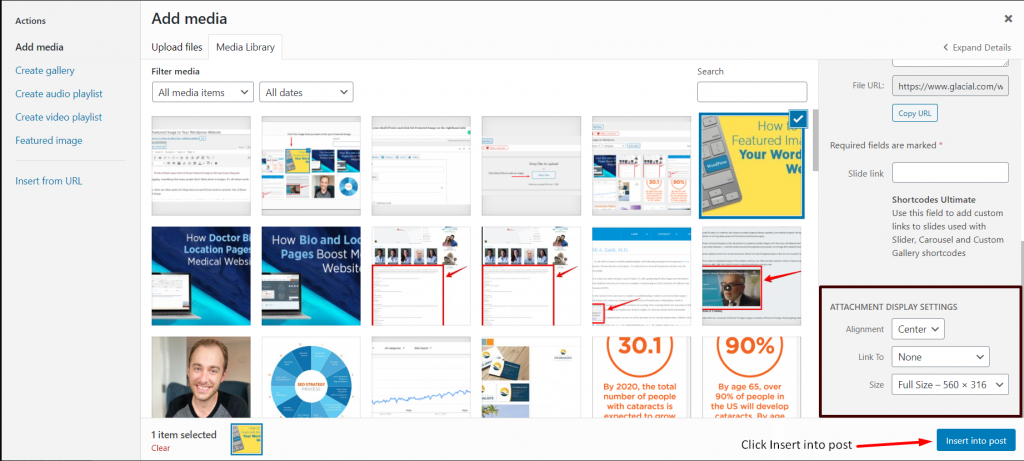
When you get to this point, make sure to have your image aligned in the center and then hit the button that says Insert into post. Now you have a featured image, as well as an image at the very top of your blog!
It’s not complicated but these are the extra things that can make a big difference when you’re blogging. Ready to take your digital marketing to the next level in 2021? Glacial Multimedia can help! Contact us to find out how!